Bicycles are an eco-friendly and healthy mode of transportation, but they also require proper maintenance to ensure a safe and enjoyable riding experience.
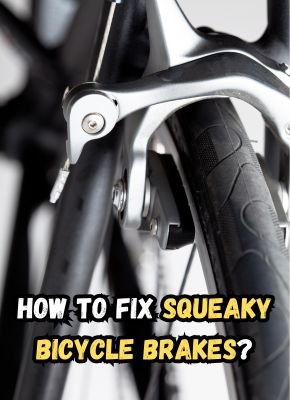
One of the most critical components of a bicycle is the braking system, which plays a vital role in maintaining control and preventing accidents.
Well-functioning brakes are essential for slowing down, stopping, and navigating through various traffic situations safely.
While squeaky brakes may seem like a minor annoyance, they can be indicative of underlying issues that, if left unaddressed, could compromise your safety on the road.
Fortunately, in most cases, fixing squeaky bicycle brakes is a straightforward process that can be accomplished with the right knowledge and tools.
In this comprehensive guide, we’ll explore the common causes of squeaky bicycle brakes and provide step-by-step instructions on how to identify and resolve these issues effectively.
Whether you’re a seasoned cyclist or a beginner, this blog post will equip you with the knowledge and confidence to tackle squeaky brakes and ensure a smooth, quiet, and safe riding experience.
Common Causes of Squeaky Bicycle Brakes:

a. Dirt and debris buildup on brake pads or rim:
Over time, brake pads and rims can accumulate dirt, grime, and other contaminants, which can lead to friction and squeaking. This buildup can occur due to riding in dusty or muddy conditions, or simply from regular use.
b. Worn-out brake pads:
Brake pads are designed to wear down gradually as they come into contact with the rim during braking. When the pads become excessively worn, they can start to squeak or produce other undesirable noises.
c. Misaligned or improperly adjusted brakes:
If the brake pads are not properly aligned or adjusted, they may rub against the rim unevenly, causing friction and squeaking. This can happen due to improper installation, accidents, or regular wear and tear.
d. Loose or worn-out brake cables:
Brake cables are responsible for transmitting the force from the brake levers to the brake pads. If these cables are loose or worn out, they can cause the brakes to function improperly, leading to squeaking and other issues.
e. Worn-out brake levers:
Over time, the brake levers themselves can become worn or develop issues, affecting the overall performance of the braking system and potentially causing squeaking or other noises.
By understanding these common causes of squeaky bicycle brakes, you’ll be better equipped to identify and address the root cause of the issue, ensuring a smooth and quiet ride.
Step-by-Step Guide to Fixing Squeaky Bicycle Brakes

a. Cleaning the brakes and rim
i. Supplies needed (e.g., degreaser, rags, brush)
Before you begin the cleaning process, gather the necessary supplies. You’ll need a degreaser or biodegradable bike cleaner, clean rags or paper towels, and a stiff-bristled brush.
Avoid using harsh solvents or abrasives, as they can damage the brake components and rim.
ii. Proper cleaning technique
Start by removing the wheel from the bicycle frame for easier access. Use the degreaser or bike cleaner to saturate the brake pads, caliper, and rim surface. Let it sit for a few minutes to help break down the grime and debris.
Use the stiff-bristled brush to gently scrub the brake pads, caliper, and rim, ensuring you remove any built-up contaminants. Rinse thoroughly with water, and dry the components completely with clean rags or paper towels.
b. Replacing worn-out brake pads
i. When to replace brake pads
Brake pads have a wear indicator, typically a groove or a line, which indicates when they need to be replaced.
If the pads are worn down to the wear indicator or beyond, it’s time to replace them.
Additionally, if the pads are glazed, cracked, or contaminated, they should be replaced for optimal braking performance and safety.
ii. How to remove and install new brake pads
Consult your bicycle’s manufacturer’s instructions or a reputable repair manual for specific instructions on removing and installing brake pads for your particular bike model.
In general, you’ll need to loosen the brake caliper, remove the worn pads, and insert the new pads according to the manufacturer’s specifications.
Ensure that the new pads are properly aligned and that the caliper is securely tightened after installation.
c. Adjusting brake caliper alignment

i. Identifying misalignment
To identify if your brake caliper is misaligned, spin the wheel and observe the position of the brake pads relative to the rim.
The pads should be parallel to the rim and make even contact when the brakes are engaged. If the pads are rubbing unevenly or not making proper contact, they may be misaligned.
ii. Adjusting brake caliper position
Most brake calipers have adjustment screws or mechanisms that allow you to adjust their position.
Consult your bicycle’s manufacturer’s instructions or a repair manual for specific steps on how to properly align the caliper for your bike model.
In general, you’ll need to loosen the caliper mounting bolts, align the pads parallel to the rim, and then retighten the bolts securely.
d. Lubricating brake cables and pivots
i. Importance of lubrication
Proper lubrication of the brake cables and pivots is essential for smooth and efficient braking performance.
Over time, these components can become dry, leading to friction, stiffness, and eventual wear and tear.
Lubrication helps reduce friction, ensuring smoother brake operation and quieter performance.
ii. Recommended lubricants
Use a high-quality bicycle-specific cable lubricant or a light penetrating oil designed for lubricating cables and pivots. Avoid using heavy oils or greases, as they can attract dirt and grime, potentially causing more friction and squeaking.
iii. How to lubricate cables and pivots
Start by cleaning the cables and pivots with a degreaser or bike cleaner to remove any existing grime or contamination. Then, apply a small amount of lubricant to the cables, working it in by moving the cables back and forth.
Next, apply a few drops of lubricant to the pivot points of the brake caliper and lever, allowing it to penetrate and coat the moving parts. Wipe off any excess lubricant to prevent attracting dirt and debris.
By following these step-by-step instructions, you’ll be able to effectively address the common causes of squeaky bicycle brakes, ensuring a quiet, smooth, and safe riding experience.
Regular maintenance and proper adjustments are key to keeping your brakes in optimal condition.
3. Maintenance Tips

a. Regular cleaning and inspection
Maintaining your bicycle brakes in top condition requires regular cleaning and inspection. Even after addressing the initial issue of squeaky brakes, it’s essential to establish a routine for keeping the brakes clean and free from dirt, debris, and contaminants.
Periodic inspection can also help identify potential issues early on, such as worn brake pads or cables, allowing you to address them before they become more serious problems.
b. When to replace worn-out components
While cleaning and adjustments can often resolve squeaky brakes, some components may need to be replaced due to excessive wear and tear.
Brake pads, cables, and even the brake levers themselves have a limited lifespan and should be replaced when they reach the end of their useful life.
Consult your bicycle’s manufacturer’s recommendations or a professional mechanic to determine when it’s time to replace these components for optimal safety and performance.
c. Importance of proper brake adjustment
Proper brake adjustment is crucial for ensuring efficient braking and preventing potential safety hazards.
Even after addressing the initial issue of squeaky brakes, it’s essential to periodically check and adjust the brake calipers, pads, and cables to maintain optimal alignment and tension.
Improperly adjusted brakes can lead to reduced braking power, uneven wear, and potential accidents.
Summary:
Well-functioning brakes are an essential component of a safe and enjoyable cycling experience. Squeaky brakes can not only be an annoyance but may also indicate underlying issues that require attention.
By following the steps outlined in this comprehensive guide, you’ll be equipped with the knowledge and skills necessary to identify and resolve the common causes of squeaky bicycle brakes effectively.
Remember, taking the time to address squeaky brakes promptly is crucial for maintaining control and ensuring your safety on the road. Don’t ignore those annoying squeaks – they could be a warning sign of a more serious issue that needs to be addressed.
To keep your brakes in top condition, prioritize regular cleaning, inspections, and proper adjustments. Staying proactive with maintenance can help extend the lifespan of your brake components and prevent potential safety hazards down the line.
By investing a little time and effort into maintaining your bicycle brakes, you’ll be able to enjoy a smooth, quiet, and safe riding experience for years to come.
FAQs:
Can I use WD-40 to lubricate my bicycle brakes?
When applied to brake components, it can attract and hold dirt and debris, potentially causing more friction and wear over time. Instead, use a high-quality, bicycle-specific cable and pivot lubricant designed for long-lasting lubrication and protection.
How often should I replace my bicycle brake pads?
The frequency of brake pad replacement depends on several factors, including your riding habits, terrain, and the type of brake pads you have.
As a general guideline, rim brake pads may need replacement every 1,000 to 3,000 miles, while disc brake pads can last up to 10,000 miles or more.
However, it’s essential to inspect your brake pads regularly and replace them when they reach the wear indicator or become contaminated or damaged.
What should I do if my brake levers feel spongy or soft?
If your brake levers feel spongy or soft when engaged, it could indicate an issue with air in the brake lines (for hydraulic brakes) or stretched or damaged cables (for cable-actuated brakes).
In the case of hydraulic brakes, you may need to bleed the brake system to remove any air bubbles. For cable-actuated brakes, you may need to adjust or replace the cables and housing.
Consult a professional bike mechanic or refer to your bike’s manual for specific instructions.
Is it safe to ride with squeaky brakes?
While squeaky brakes can be annoying, they don’t necessarily pose an immediate safety risk.
However, it’s crucial to address the underlying cause of the squeaking promptly, as it may indicate a more serious issue, such as worn-out brake pads or misaligned components.
Riding with squeaky brakes for an extended period can lead to further wear and potential brake failure, compromising your safety on the road.
Can I adjust my brakes myself, or should I seek professional assistance?
Improper brake adjustments can lead to safety hazards and potential accidents.
Remember, when it comes to your brakes, safety should always be the top priority. Don’t hesitate to consult a professional if you’re uncertain about any aspect of brake maintenance or repair.